
Workspace settings
Portal appearance, editing permissions and the portal address are all configured under Settings in the dashboard sidebar. The available sections are Board, Widget, Members, Portal, and one section named Workspace on self-hosted installations or Organization on Cloud. Boards and the widget have separate documentation: boards and the widget. This page covers the remaining sections and uses Workspace for both versions unless the name differs in the interface.
Branding: logo, colour and default theme
Settings → Workspace contains a General card for the workspace name and a Branding card for the portal's appearance.
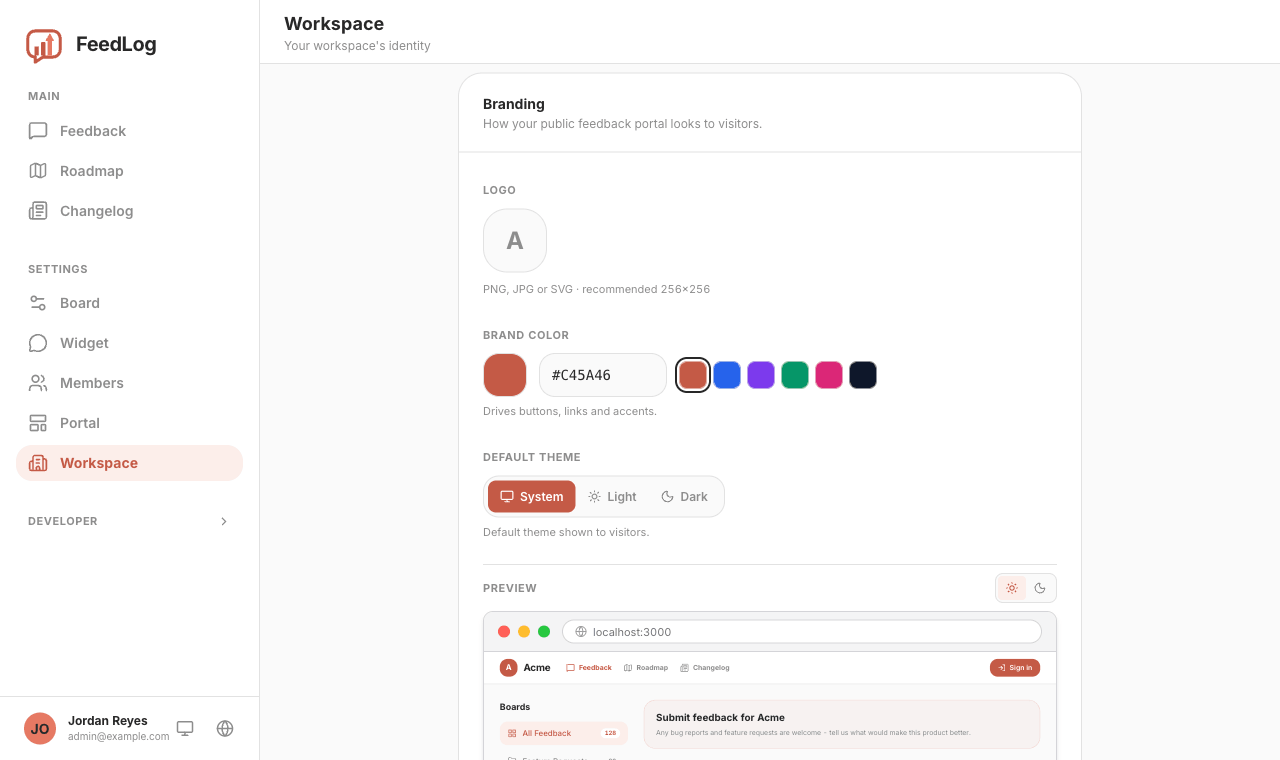
- Logo: click the tile to upload a PNG, JPG or SVG. The recommended size is 256×256. If you do not upload a logo, the portal displays the first letter of the workspace name.
- Brand colour: enter a six-digit hex value, use the colour picker or select one of the six presets. If FeedLog cannot parse the value, it uses the default terracotta colour and does not display an error.
- Default theme: choose System, Light or Dark. This setting applies until a visitor chooses a theme.
The preview updates as you edit. Its light/dark toggle changes only the preview; it does not change the saved default theme. Only Owners can edit these settings. Other roles can view the card, but its fields are disabled.
Why the displayed brand colour may differ from the value you entered
FeedLog uses the hex value as the basis of the palette and makes two adjustments.
Dark mode increases the colour's lightness. Light mode uses the hex value unchanged. Dark mode keeps its hue and saturation but increases its lightness so that the primary colour remains distinguishable against a dark background.
FeedLog selects the foreground text colour. It compares the contrast ratio of the brand colour against white and near-black, then uses the option with the higher contrast. A pale yellow button therefore uses dark text, while a navy button uses white text. The foreground colour cannot be set manually because it must remain readable against the selected brand colour.
Hover and highlight states use a lighter tone of the same hue, with their foreground selected in the same way. Backgrounds, borders and body text remain neutral grey regardless of the brand colour.
The welcome message at the top of the portal
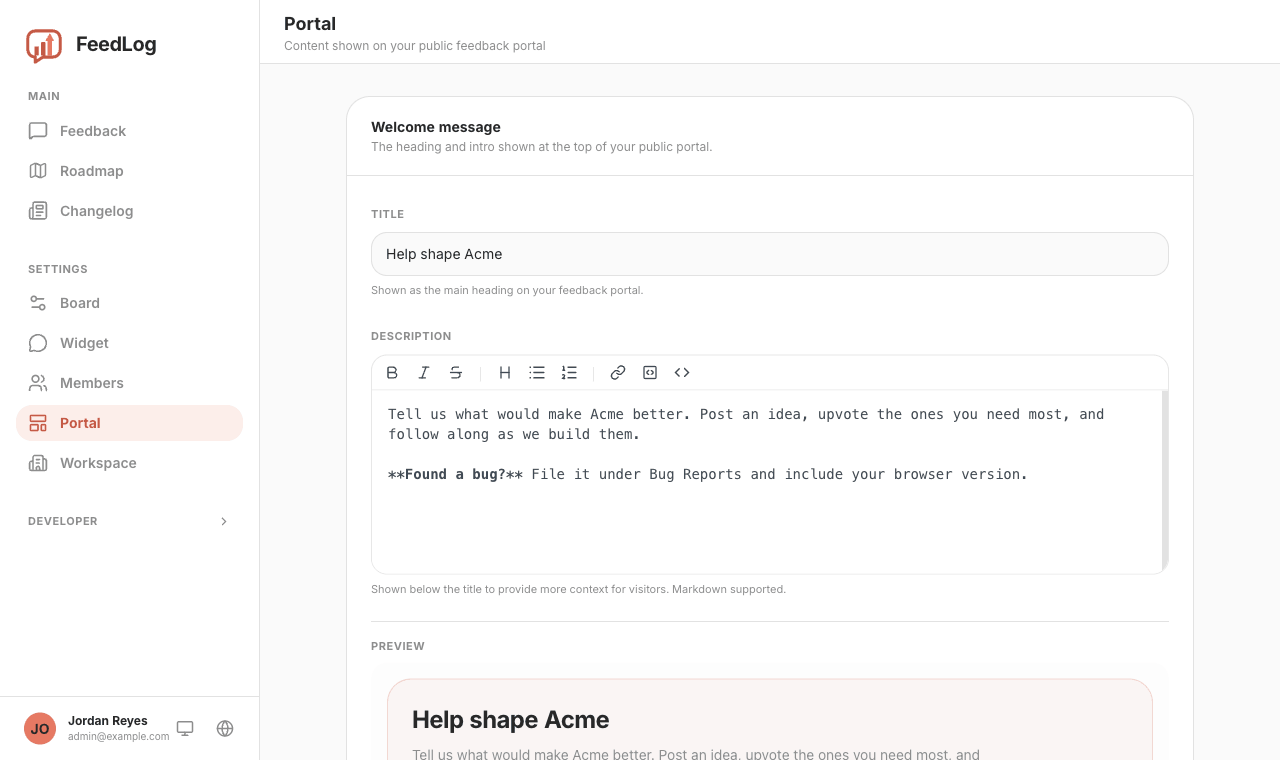
Settings → Portal controls the heading and introductory text above the feedback list. The title is plain text. The description supports Markdown and has a live preview below the editor. Only Owners can edit these fields.
Recommendation
Use this message to tell visitors which board to choose, what details to include and what happens after they submit feedback. If both fields are empty, the portal starts directly with the feedback list and displays no welcome message.
Workspace name and switching between organizations
The General card under Settings → Workspace contains the workspace name. FeedLog uses this name in places that identify the workspace, including invitation emails with the subject "You're invited to join {name} on FeedLog". Name changes take effect immediately and do not alter existing content.
A self-hosted installation has one workspace, so the card contains no other organization fields. On Cloud, it also shows the workspace subdomain. If you belong to more than one organization, use the switcher at the top of the sidebar to move between them.
Serving the portal from your own domain
By default, a Cloud portal uses a FeedLog address. You can instead connect a domain that you own. This setting is available only on Cloud because a self-hosted installation already runs on your own domain.
Enter the domain. Under Settings → Organization, enter and save the custom domain. A subdomain such as feedback.acme.com is the usual choice.
Add the CNAME record. FeedLog displays a Name and a Content value. Add that exact record at the DNS provider that manages your domain's nameservers. This may be different from the company where you registered the domain.
Wait for the status to become Active. The status progresses from DNS not configured to Issuing certificate and then Active. FeedLog checks the configuration periodically; Refresh runs another check immediately. Once the status is Active, the domain serves the portal over HTTPS. FeedLog manages and renews its certificate.
To disconnect the domain, clear the field and save. After you confirm the change, FeedLog deletes the certificate and the domain no longer serves the portal.
Common errors you may encounter
The status remains DNS not configured. First check the CNAME record. Copy the Content value exactly as shown. At many DNS providers, Name is only the label (feedback), not the complete hostname (feedback.acme.com). Add a CNAME instead of editing an existing A record; otherwise the domain continues to resolve to the previous server. If the provider offers a proxy or redirect for the record, turn it off.
The record is correct, but the status has not changed. Your provider may still be publishing the DNS change, or the previous record's TTL may not have expired. Changes commonly take several minutes. A record with a long TTL can take an hour or more. Refresh checks again immediately, but cannot shorten DNS propagation time.
The status remains Issuing certificate. This status means that DNS resolves correctly and certificate validation is in progress. The domain may show a browser certificate warning until issuance finishes. If the status does not change after several hours, check whether the domain has a CAA record and confirm that it permits the issuing certificate authority. A restrictive CAA record can block issuance without a clear error in the dashboard.
Team members and invitations
Settings → Members lists all workspace members and pending invitations.
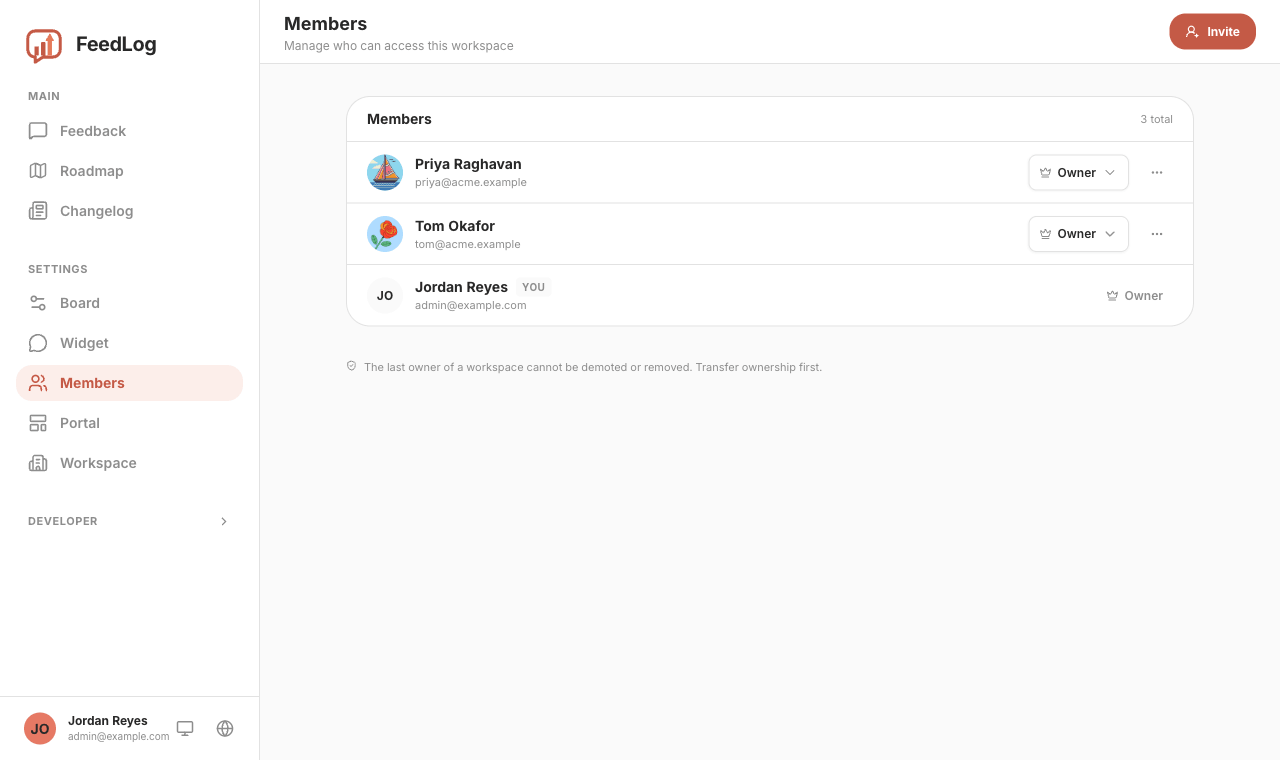
Invite accepts one email address or multiple addresses separated by commas or new lines. One selected role applies to every address in that batch. Invitations expire after seven days. Until an invitation is accepted, it appears at the top of the page with Copy invitation link and Revoke actions in its menu.
Each invitation is restricted to its recipient address. If someone opens the link while signed in with a different address, FeedLog explains the mismatch and offers an account switch instead of adding that account to the workspace.
On a self-hosted installation without an email provider, the invitation dialog shows a warning. FeedLog still creates the invitation but cannot deliver it. Copy the invitation link and send it to the recipient yourself.
What Owner, Manager and Contributor can each do
Contributor provides read-only staff access. Contributors can sign in to the dashboard, browse and search all feedback, and view roadmap and changelog drafts. They cannot edit feedback, change statuses, merge duplicates, edit boards or changelog entries, or invite members.
Manager can manage day-to-day content and settings: create, reorder and delete boards; edit and delete feedback and comments; merge and unmerge duplicates; change feedback statuses and send status-change notifications; write and publish changelog entries; and configure the widget. Managers can also invite members, revoke invitations, change roles and remove members. They cannot grant the Owner role, which does not appear in their role selector.
Owner also controls workspace-level settings: the name, logo, brand colour, default theme, portal welcome message, custom domain, SSO signing secret and promotion of another member to Owner. Branding fields remain disabled for a Manager even when that Manager can edit feedback.
The last remaining Owner cannot be demoted or removed. Promote a second Owner first. Members also cannot change their own role or remove themselves from this page.
How the initial Owner is assigned
On Cloud, the person who creates a workspace becomes its Owner. Every later member joins by invitation.
Self-hosted installations do not assign ownership to the first registered account. Owner access is initialized from the SYSTEM_ADMIN_EMAILS environment variable, which accepts a comma-separated list of email addresses. An address on that list becomes an Owner only when its account is created. Adding an address after the account already exists does not change its role, and restarting the instance does not repeat the check. To recover, add an address to the variable and register a new account with an address that has never been used on the instance. Self-hosting overview describes the complete recovery procedure.
SYSTEM_ADMIN_EMAILS initializes Owners; it is not a live permissions list. After account creation, roles are managed on the Members page. Removing an address from the variable does not demote its existing account, and adding an address does not promote an existing account.